

With the rapid development in the field of AI, it is hard to keep up with the most recent developments. This post is aimed at introducing few such jargons and what they can provide in terms of increasing our productivity. Microsoft has already called it the age of copilots. At the centre of agentic AI is AI Agents.
What is an AI Agent?
Its an AI program that can help us complete a wide variety of manual effort intensive tasks with minimal human intervention. The examples are
- Writing code
- Writing emails
- Provide meeting summaries
- And so much more
These AI agents are powered by Large Language Models (LLMs).
What is Semantic Kernel?
Semantic Kernel helps to integrate LLMS like Open AI, Azure Open AI and Hugging Face with traditional language like C#, Python and Java. Developers can use the SDK and create plugins to interface with the LLM to perform various tasks. The Semantic Kernel SDK simplifies the process of developing AI-Powered applications.
For a tradition developer, to integrate complex AI models into their application can be time consuming and complex. The Semantic Kernel makes this integration easier. It provides an abstraction layer which enables developer to leverage the AI capabilities without a steep learning curve which was required if they directly use the APIs of LLMs.
Building Your Kernel
The setup is minimal and you will need the SDK and the endpoint of the LLM service. We can divide this exercise into 2 parts
- Creating an Open AI resource in Azure
- Code implementation using Semantic Kernel
Creating an Open AI resource in Azure
- Navigate to azure portal
- if you can see the Azure Open AI Resource Icon in your homepage you can click that or you might have to search for Azure Open AI in the search bar. Refer below image.

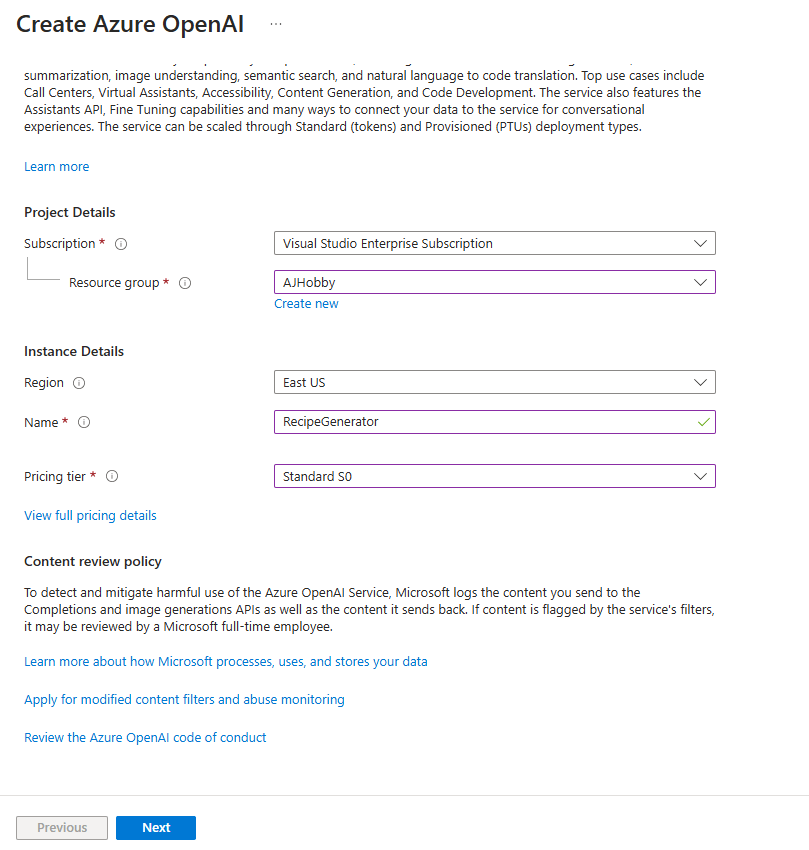
3. Create an Azure Open AI resource using the default settings. Refer the below images for a step by step.


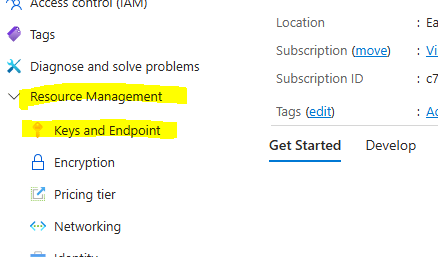
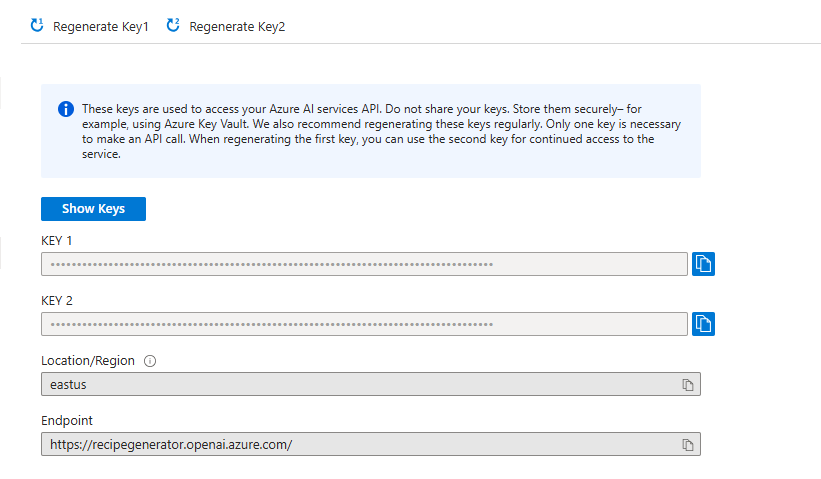
4. You need to get the Endpoint and keys once the resource is created. Remember to keep these private and secure, In a production environment we would keep this in an Azure Key Vault. Click on the Go to resource button below and copy keys and endpoint from the Resource Management tab. Refer the images.

5. The next step is to deploy a model. For this example we are using gpt-4o-mini. Once the resource is created and we have copied down the endpoint and keys, in the resource page we can see a Get Started tab. #
1. Click on the Explore Azure AI Foundry portal button. The old name was Azure OpenAI Studio.
2. In AI Foundry page, left side you can see a Shared Resources section, click on the Deployments option.
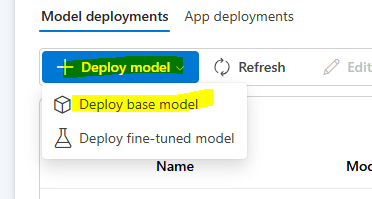
3. Click on the Deploy Model button and select base model option.
4. Select the gpt-4o-mini from the list of models in the left side.
5. Keep the default options and Select Deploy.
Refer the images for a step by step.


Code implementation using Semantic Kernel
This is the second part in this exercise. We need to create a .net console app that can easily interface with the Open AI model that we created. You have to note this is easily possible because we are using Semantic Kernel. If we have to interface with the model’s native API, it would be a huge learning curve and a more complex thing to do.
- Open Visual Studio and create a console application. We are using .NET 8.0. Save it in your folder of choice.
- Add the .net NuGet package Microsoft.SemanticKernel using NuGet Package manager or alternative use this command if you are using cli
dotnet add package Microsoft.SemanticKernel --version 1.40.0
3. In the program.cs we need to add some code.
using Microsoft.SemanticKernel;
var modelId = "gpt-4o-mini";
var endpoint = "";
var apiKey = "";
var builder = Kernel.CreateBuilder()
.AddAzureOpenAIChatCompletion(modelId, endpoint, apiKey);
// Build the kernel
Kernel kernel = builder.Build();
// Testing the above chat completion builder
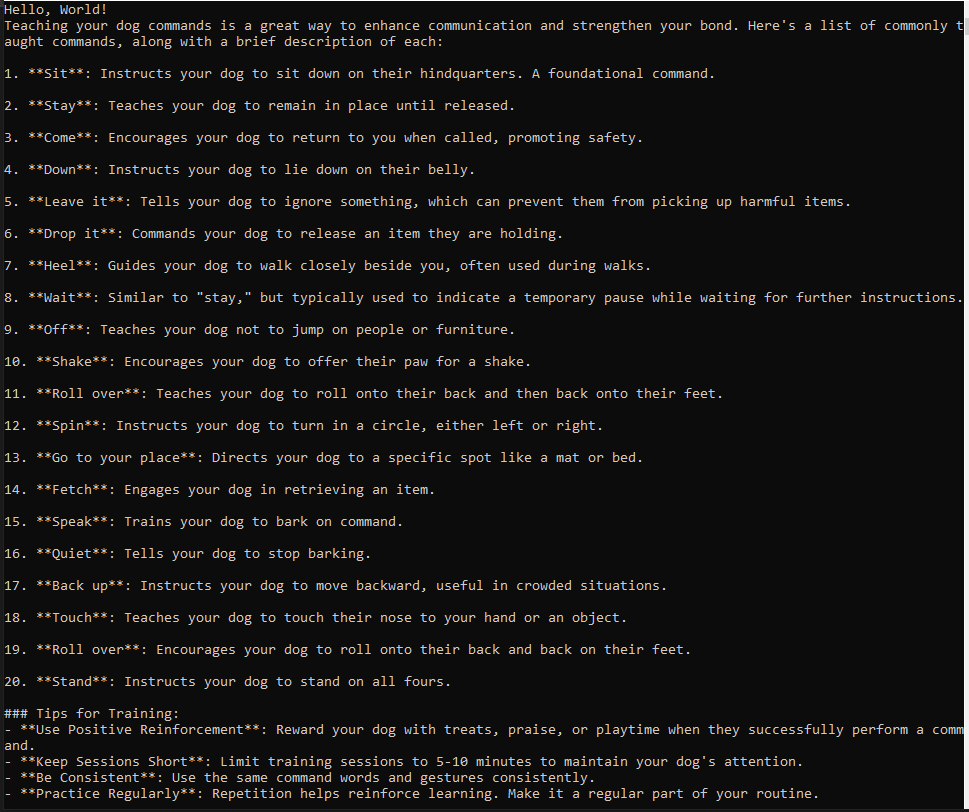
var result = await kernel.InvokePromptAsync("Give me a list of commands to teach my dog");
Console.WriteLine(result);
Code Breakdown
using Microsoft.SemanticKernel;
We begin by importing the Microsoft.SemanticKernel namespace, which provides the core functionality for interacting with LLMs.
var modelId = "gpt-4o-mini";
var endpoint = "";
var apiKey = "";
modelId: The identifier of the deployed OpenAI model in Azure (e.g.,"gpt-4o-mini").endpoint: The Azure OpenAI service endpoint where the model is hosted.apiKey: The API key required to authenticate with Azure OpenAI.- Please note that these are the details that we copied when creating an Open AI resource
var builder = Kernel.CreateBuilder()
.AddAzureOpenAIChatCompletion(modelId, endpoint, apiKey);
Kernel kernel = builder.Build();
Once the configuration is set up, we callBuild()to create aKernelinstance, which serves as the central AI execution engine.
var result = await kernel.InvokePromptAsync("Give me a list of commands to teach my dog");
Console.WriteLine(result);
We invoke the model using InvokePromptAsync(), passing in a prompt. This sends the request to Azure OpenAI, and the model generates a response. The result is then printed to the console.
Hope you found this post useful, feel free to reach out to me via the comments.

Leave a comment